How to Download & Print Canva Invoices: PDF, JPG & PNG Guide
Why Print Quality Matters
A pixelated invoice hurts your brand’s credibility. Here’s how to ensure sharp, professional results:
-
300 DPI Myth: Canva automatically uses 300 DPI for custom sizes (no manual setting).
Critical Checks:
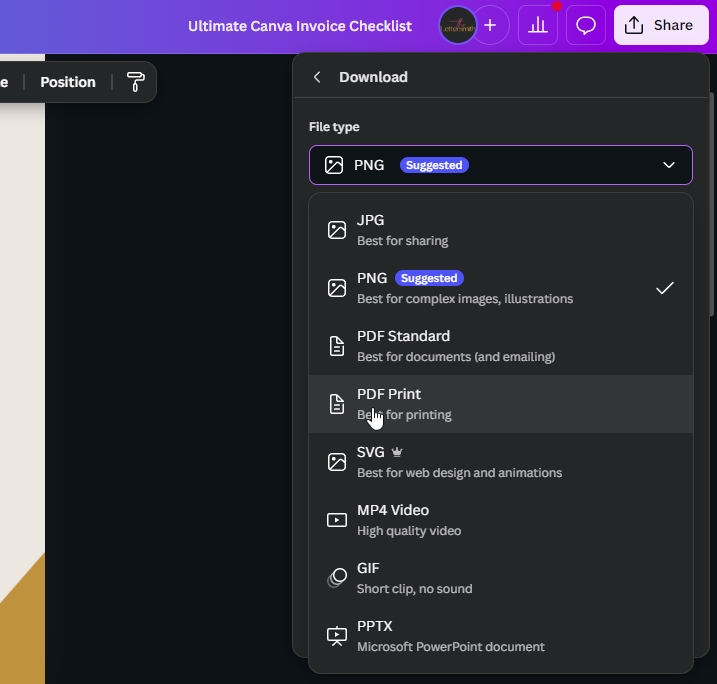
✅ Use PDF Print (not "Standard") for sharp text.
✅ Test print a section first.
✅ Avoid tiny fonts (<10pt) and low-res images.
Pro Tip: “Printers read ‘PDF Print’ as 300 DPI—always choose this option!”
Step 1: Download as PDF (Print-Ready)
-
Click Share → Download → PDF Print.
-
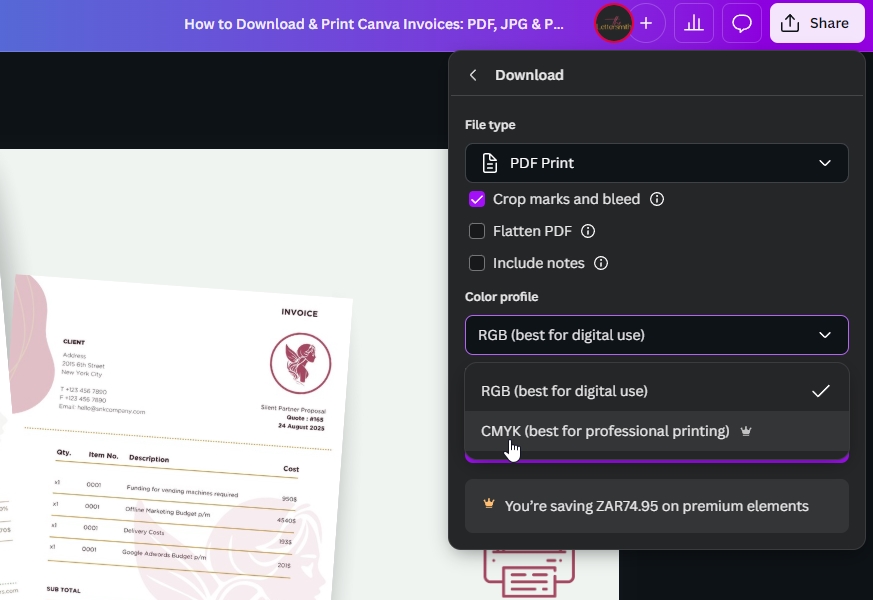
Under More Options:
-
Enable Trim Marks for professional printing.Select CMYK if using a print shop.
-
Name file:
Invoice_Client_2024.pdf.
Step 2: Save as JPG/PNG (Digital Use)
-
JPG: Smaller size (email-friendly).
-
PNG: Transparent background (for digital estimates).
-
Settings: 300 DPI (auto-set in Canva).
Design Hack: “Add a watermark to PNGs for client proofs!”
Step 3: Print Canva Invoices Like a Pro
Troubleshooting Common Issues
| Problem | Fix |
| Blurry text | Use PDF Print + 10pt+ fonts |
| Cut-off edges | Enable trim marks + 0.5" margins |
| Wrong colors | Export in CMYK for print shops |
FAQ
Q: Can I change DPI manually in Canva?
*A: No—but custom designs auto-use 300 DPI. Just pick PDF Print!*
Q: Why is my JPG low quality?
A: Canva exports JPGs at 96 PPI. For prints, always use PDF!
People also read:
The Best Invoice Templates in Canva for Small Businesses (+ Pro Customization Tips)